So you’re interested in getting yourself a custom cosplay from a seamstress or costume maker, but the cost they quoted you had you mildly nauseous? Did you think it was ridiculous? Perhaps it just shocked you? Either way, this article should give a much better idea of WHY the costs for something custom made for you can be so seemingly exorbitant.
Listed below are three costumes I’ve deconstructed down to the thread that holds them together to show you the costs going into making these costumes. I hope it’s eye-opening and enlightening. I also hope it doesn’t terrify you. It surprised me a little, actually writing it all down like this, to see how much really does into even the simplest of pieces.
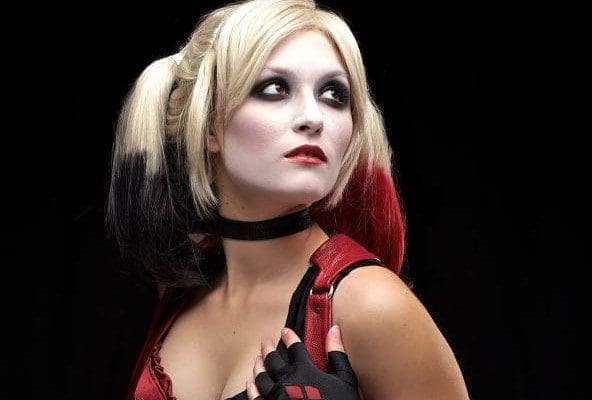
Arkham Knight Harley Quinn
Cost: Approx $1200 (varies slightly per customer)
Pieces:
- Hat – $50
- Base police hat – $22
- Worbla – $2 worth
- Paint – $0.50
- Sealer – $0.50
- Labor – $25
– First cut, mold, shape, and layer the Worbla to look like a GCPD police badge before doing all the painting, weathering, and detailing. Once that is complete, seal the paint with a waterproof sealer, let it dry and attach the finished badge to the hat.
- Harness – $220
- Veg Tanned Leather – $50
- Rivets – $5
- O-rings (x6) – $3
- 2 snaps for back of harness $0.50
- Metal dome studs – $5
- Grommets – $1
- Lacing – $1
- Thread – $1
- Leather needle – $1
- Paint – $2
- Sealer – $0.50
- Labor – $150
– Start by patterning, drafting, and cutting a pattern that is made ON the customer. Then make a foam first draft of the harness and perfect the fitting. Once done cut, wet, and shape the leather then rivet the harness together; including all the O-rings (meticulous fitting time!). Let the harness dry, stain it black, and let it dry again. Paint all the red trim, dry again, then do two layers of sealer…drying between the layers. Next add the snaps in the back, pop holes for and hammer in the grommets, and lace it up. For the bottom strap of the harness, use studs to attach it to the corset itself at the waist.
- Underbust corset – $155 – $200 (pending cost of leather. Remember…this is for REAL leather too. I don’t HAVE to make the corset in leather, I just usually do.)
- Leather – $40-80 (usually have to buy at least a full yard/skin and you need red AND black. This isn’t even the price of the REALLY good stuff.)
- Cotton for lining (1yd) – $3
- Thread – $2
- Quilt batting – $3
- Lace trim (1yd at least. Keep in mind the final measurement of the bottom of your corset!) – $4
- Grommets – $1
- Lacing – $2
- Labor – $100
– First pattern and cut the corset pieces in both the leather and lining then draw out the criss-cross pattern on the front center piece in chalk. Layer leather center front piece over the quilt batting and sew together along ALL the lines. Sew the corset together, do the same with lining, and add boning. Next, sew the front and lining together, flip right side out, and sew it down along the edges. Lastly, add the grommets and lacing.
- Altered bra – $80-90
- Victoria Secret Bombshell bra base – $50
- Milliskin – $3 (IF I happen to have some on hand. If not, I have to buy a yard which costs $12)
- Bias Tape (Red & Black) – $5
- Thread – $2
- Labor – $20
– First, cut a piece of red Milliskin and use that to cover one cup. Then add black and red bias tape to contrasting sides.
- Shirt – $50 (yes…I charge $2 LESS than the below totaled up. And yes, I also alter already made shirts. It’s one of the ways I save the customer money.)
- Shirt base – $20
- Veg tanned leather – $5
- 2 O-rings – $1
- Paint – $0.50
- Sealer – $0.50
- Labor – $25
– Alter the cut of the shirt to lay properly under the costume. Next cut, paint, and seal the leather strips then attach the O-rings. Lastly rivet it to the sleeves.
- Arm pieces – $30
- Milliskin (red AND black) – $10
- Lace trim (1yd) – $4
- Thread – $1
- Labor – $15
– Pattern pieces and cut out the Milliskin. Lace trim gets sewed down on the wrist end then pin and sew them up.
- Skirt/petticoat – $150
- Cotton (5yds Kona cotton) – $30
- Lace trim (5yds) – $20
- Petticoat – $18
- Thread – $5
- Elastic – $2
- Labor – $75
– Start off by doing the math! Find out how long to make each tier PRE ruffling, the two connector pieces, and waistband. Lots of cutting. Next, iron over the hem edges of every ruffle then sew them down, making sure to add the lace trim to the bottom ruffle. Sew long stitches along the whole top of each ruffle and pull tight to ruffle each up to the right lengths. Sew it all together. Add the elastic and close the waistband.
- Tights – $100
- Milliskin (1yd/ea red and black) – $30
- Wonder Under – $3 worth
- Studs for the knees – $6
- Thread – $1
- Labor – $60
– Start with patterning and cutting out the Millliskin. Cut another portion of Milliskin and iron it the to the Wonder Under then cut out the diamonds. Remove the backing on the WU and iron the diamonds to the still to be sewn tights at the thigh. Sew tights together then try on and make sure they fit. If so…add the waistband. Attach the studs in a diamond pattern at the knee.
- Boots – $125
- Boot base – $40
- Meltoninan Color Preparer – $6
- Meltonian Nu Life Spray (red & black – if boots aren’t black to begin with, best results come from tan boot bases) – $20
- Paint – $0.50
- Sealer – $0.50
- Sandpaper – $4
- Pyramid studs – $6
- Hot glue – $1
- Shoelaces (red & black unless base boot comes with one of the colors) $2
- Labor – $45
– Wipe down the boots with Color Preparer to remove finish and spray with NuLife Spray. Allow to dry. Use sandpaper to begin the aesthetic look of weathering. Careful use of paints will finish it up. Seal the shoes with several layers of waterproof sealer. Weather the shoelaces with paint and sandpaper as well to make them look used. Use hot glue (to secure the studs) and pliers (to close the hooks inside the boot) to attach the studs to the boots.
- Bat – $100
- Base bat – Louisville Slugger – $30
- Dremel grinding barrel attachment – negligible
- Sandpaper – $1
- White spray paint – $3
- Red spray paint – $3
- Painter’s Tape – $2
- Worbla – $1
- Hot glue – $1
- Metal dome studs – $3
- Paints – $0.50
- Sealer – $0.50
- Labor – $55
– Sand off the wording and finish on the bat with Dremel and sandpaper. Apply several layers of white spray paint and let dry. Use the painter’s tape to tape off the ‘barber pole’ design and cover the handle as well so there’s no over spray. Spray the red and let dry. Cut 2 bands of Worbla for the top band and 2 for the mid one. Heat and stick together then attach to the bat. Attach the metal domes to the Worbla strips. Tape off around the bands and paint. Allow to dry and remove tape. WEATHERING – aka the blood and dirt step! Not really, but…paints can be convincing when used right! Seal with waterproof spray to finish things off.
Sub total : $1060-1115
Then you add in the factors of gas, my time buying/gathering the materials, shipping costs to–and possibly from–me, and other minor things and you get to the $1200 I generally charge for the costume.
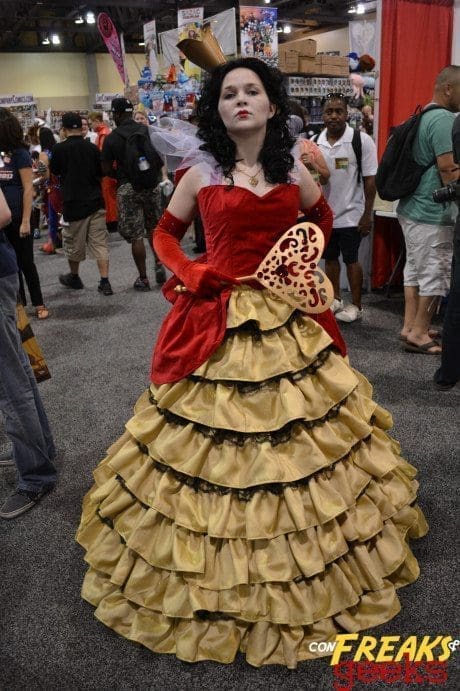
Disney Designer Dress – Queen of Hearts
Cost: $1000
Pieces:
- Scepter – $50
- Worbla – $12
- Jewels – $10
- Wooden rod – $1
- Paints – $1
- Sealer – $1
- Labor – $25
– Draw out the pattern of the heart onto the Worbla. Cut it out twice, heat bond them together. Cover the wooden rod with Worbla and attach the heart. Then it’s time for the decorative Worbla accenting before painting and sealing. Add the jewels and it’s done.
- Crown – $35
- Worbla – $8
- Paints – $1
- Sealer – $1
- Labor – $25
– Pattern out the crown with foam then cut it out of the Worbla twice, heat bond it all together. Then it’s time for the decorative Worbla accenting before painting and sealing.
- High collar halter corset w/attachedpeplum bustle – $250
- Velveteen (4yds) – $60
- Light interfacing (1yd for corset body) – $2
- Thick interfacing (1 yd for collar) – $3
- Cotton lining (4yds) – $20
- Canvas (1yd to sandwich in the corset for stiffness) – $10
- Boning – $5
- Thread – $5
- Labor – $145
– Pattern the corset, collar, and peplum pieces and cut them all out. Layer the lining with canvas, sew together, and add boning. Iron interfacing to velveteen and sew together. Prep the halter strap and make the high collar then sew them down to velveteen. Sew facing and lining together, but leave the bottom open. Flip right side out. Prep the peplum pieces and sew them in open pocket then sew it closed.
- Giantbutt bow – $85
- Velveteen (2yds) – $30
- Interfacing (2yds) – $5
- Thread $2
- 2 large snaps (to attach to corset) $3
- Labor – $45
– Cut out long strips the length you wish, iron interfacing on. Sew them together, front facing front. Flip them right side out and sew them down. Tie into a bow and secure. Sew one half of the snaps to the top of each bow and the other halves to the back of the corset.
- Gloves – $30
- Stretch velvet (1yd matching the velveteen) – $8
- Thread – $2
- Labor – $20
– Pattern, cut, sew, flip right side out.
- 8-tier cupcake ruffle skirt – $460
- Gold satin (24yds) – $75
- Black lace trim (30yds) – $60
- Lining (8yds) – $15
- Elastic – $2.50
- Thread – $7.50
- Labor – $300 (this is extremely labor intensive…)
– Cut the lining of the skirt which all the subsequent layers will be sewn to. Spend FOREVER cutting out two strips for each layer. Length of each layer strip before ruffling – 100”, 150”, 200”, 225”, 275”, 315”, 360”, and 400” unless they need to be altered for a different waist measurement. Sew together the two strips for each layer face to face, flip, and iron down. Next sew along the top, pull into the ruffle lengths, and attach to the skirt. Do the same with the lace trim between each layer. Make the waistband, attach, and add elastic.
- Heels – $20+ (This is a completely optional step if you wish to wear something more comfortable. No one will ever see your shoes under the huge skirt.)
- Buy gold heels – $20+
- Labor – $20
– Any decorating the client may want; usually big red hearts over the toes.
- Necklace – $15
- Charm – $2
- Chain – $2
- Findings – $1
- Labor – $10
– Simply construct the necklace.
- Hoop skirt – $20
- Buy a hoop skirt. (It’s so much easier to simply buy one than make it.)
Subtotal – $965 + travel time/shipping costs/extraneous = $1000
There’s less of the extra costs on this one because I don’t have to order as many of the components online.
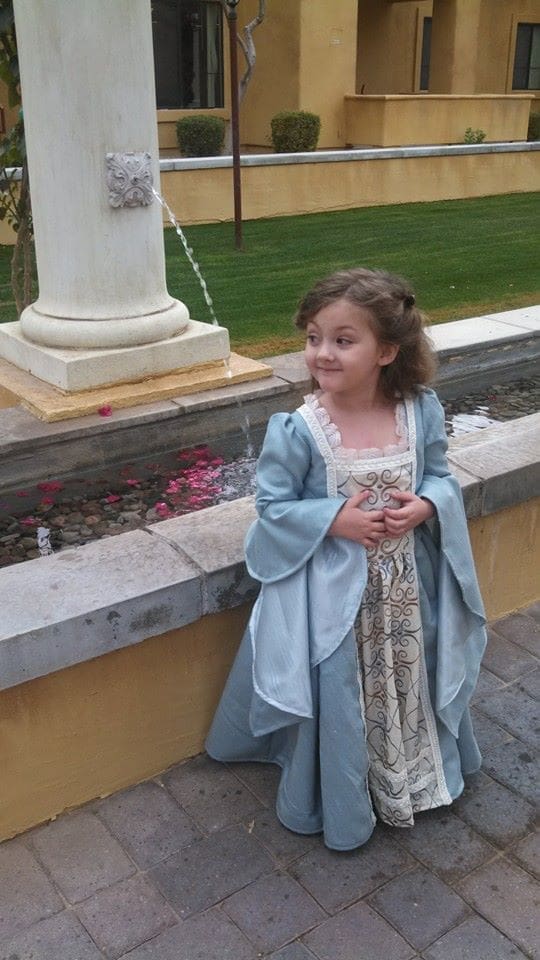
Princess dress for a little girl
Cost: $250+ (Depending on a variety of variables)
Pieces:
- Dress – $175+ (Depending on materials chosen. Below is just what I generally go for with children because it’s cheaper and durable, but still pretty. Costs $175.)
- Satin Shantung (5yds) – $35
- Lining (5yds) – $25
- Contrast fabric (2yds) – $10+
- Interfacing (1yd for bodice section) – $2
- Zipper – $2
- Thread – $1
- Labor – $90
– Cut all the different materials out. Pin and sew everything together. Add the zipper. Detailing with ribbon before ironing.
- Wand – $15
- Nice chopstick – $1
- Hot glue – $1
- Paint – $0.50
- Sealer – $0.50
- Small crystal – $2
- Labor – $10
– Use the hot glue to make patterns/swirls whatever over stick and hold it as it dries. Leave a spot on the end to add the crystal. Do all the paint and detail work. Then glue the crystal to the top and touch up paint to hide the glue. Seal the wand and done!
- Shoes – $20 (Generally don’t spend more than this. Sometimes I don’t do this at all and the customer buys some themselves. So I’m not counting this in the total cost.)
- Crown/headpiece – $50+ (Depending on the amount/quality of the faux flowers)
- Faux flowers – $20+
- Floral wire – $4
- Hot Glue – $1
- Labor – $25
– Measure around the head and create a ring with the wire in the right size. Strategically fill the crown with flowers/leaves/moss/etc till it’s nice and full.
Subtotal: $240 + travel time/shipping costs/extraneous = $250+
I only charge $15/hr for my work. I could charge far more than that, but I’m lucky enough that my household is sustainable with me keeping my prices where I do. If something were to change, I could easily charge $20-25 for my work and feel completely justified by it. Because I know my work is worth it. Right now, I’d rather pass my good luck to the customer in the form of the lowest prices I can offer!
Now you know why commissioning something just for you might cost far more than you expect it to! We’re not doing it to be mean or greedy. This is just what the costs of handmade quality are. You see it everywhere, not just in costumes. Props by skilled artisans usually garner raised brows as well when people find out the costs, but they have to sculpt, make a mold, cast, finish, paint, etc. There’s always a level of craft and skill that goes into anything custom. That skill came at a price and we deserve to be paid for that skill.
I hope that this article has given you a better idea of what you’re looking to get into if you commission a custom cosplay! Happy costuming everyone!!
Contact Maise Designs:
Facebook: https://www.facebook.com/MaiseDesignsSeamstress/
Etsy: https://www.etsy.com/shop/MaiseDesigns
Email: maisedesigns@gmail.com
Gabby is a seamstress, leather worker, & jewelry artist. She established Maise Designs in 2004, but four years later focused her efforts on compelling opportunities in the niche world of costume craft and design. After completing her first Cosplay commission, DC's Huntress, her reputation quickly grew in the AZ Cosplay community and has smoldered ever further outward with greater opportunities to collaborate with high profile personalities within the industry. Her repertoire includes pieces ranging from Renaissance fantasy to Disney princesses, masquerade leather-work and more, but her specialties are Comic Book and Video Game based Cosplay.
She's been blessed to work with such prominent local talent as Itty Bitty Geek, Aaron Forrester, Katy Mor, and Amie Lynn--for whom she constructed Vivienne for the Dragon Age: Inquisition promotional marketing. She's worked on several costumes with world renowned Cosplayer Jessica Nigri, most notably her Arkham Knight Harley Quinn which was worn for Warner Bros at San Diego Comic Con 2014.
Most recently she was the seamstress for the Steampunk X-Men Girls cosplay group at Phoenix Comic Con and is looking forward to next year's project!


